
Garden Diary: A Year of Our Wildlife Pond
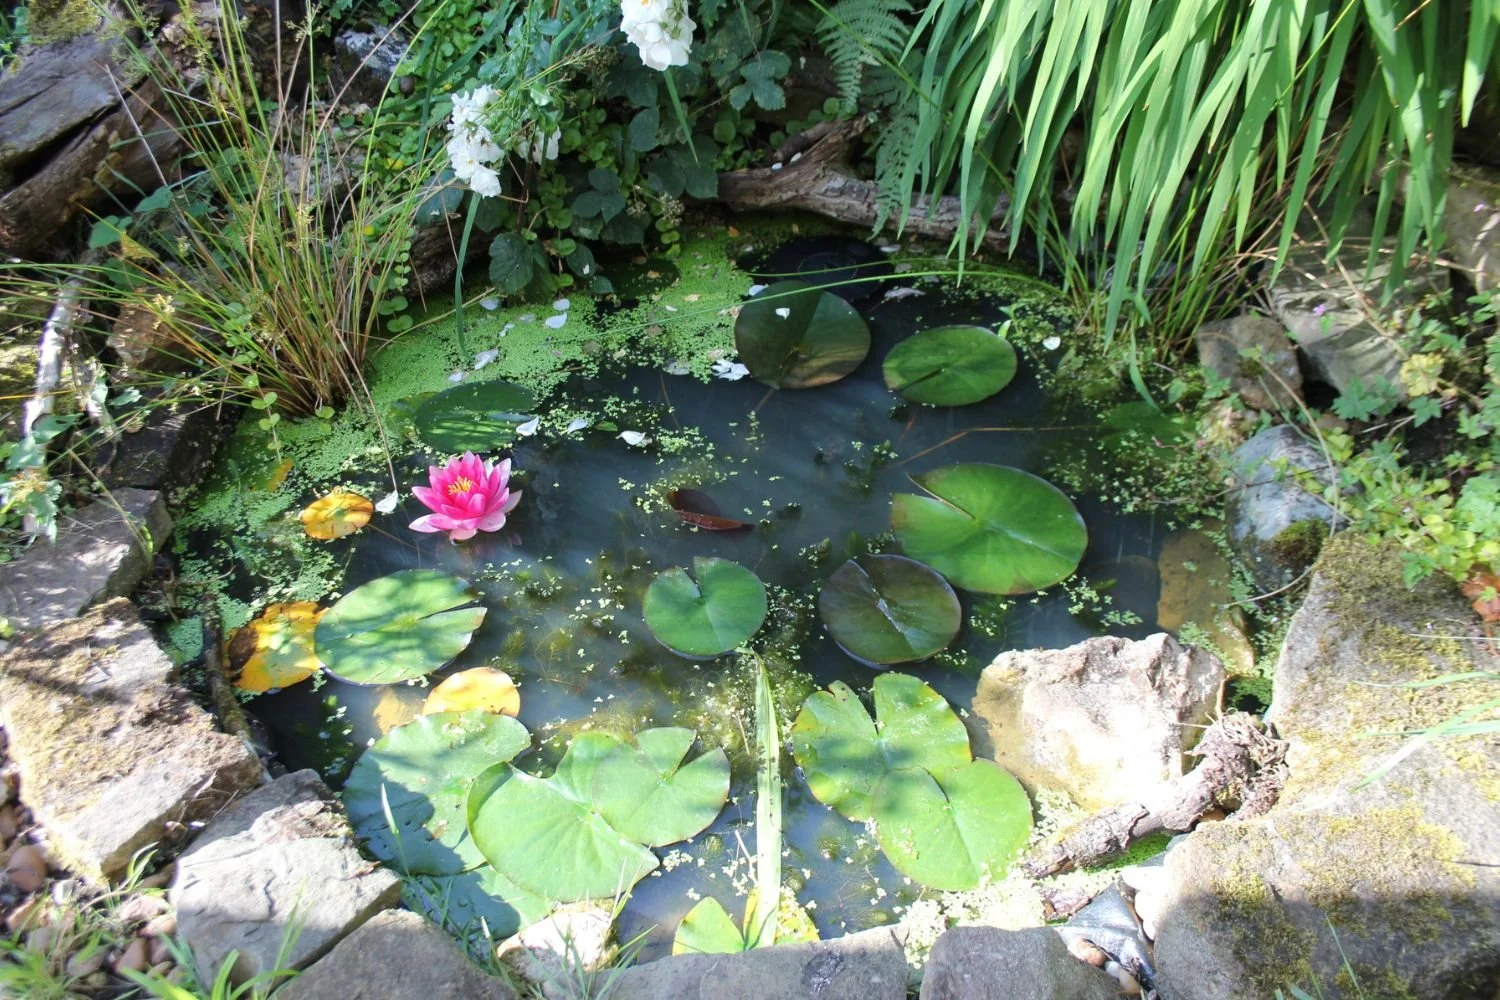
What could be more relaxing than watching a pair of Dragonflies hover around the pond, the glimmering reflection of the apple tree, a bright magenta Pond Lilly in full bloom with the sound of water trickling gently in the background? Just over a year ago we created a wildlife pond in our garden. In this post, I’ll share a bit about pond from the planning, plants and pollinators, as well as a few lessons I’ve learned along the way.
Research and Planning
On the downlow I’d had a ‘Lovely Ponds’ Pinterest board simmering away for a while, with the dream of one day bringing it to life. When we moved in, for the first year, I did demonstrate a modicum of restraint and simply eyed up the corner of the garden where the pond would be. Truth be told, I had drawn a plan of where the pond would be long before we even moved into the house, as it took us so long to finalise the purchase of the house, this type of planning kept my mind busy and helped me to feel excited amidst the house-buying uncertainty.
My hope was to create a pond that attracted wildlife, that acted as a haven for garden birds, pollinators, frogs and insects. A pond that blended in and looked like it had always been there, not too pristine, suitably natural and a little wild.
Planning began with reading The Wildlife Trusts How To Build a Pond guide, this gave me a basic understanding of how to tackle the dig, the lining and a bit about the plants that we would need.
The Pond Liner
The corner of the garden that I’d earmarked for the pond had not much of anything planted in it, bar a rose bush and a Crocosmia 'Zeal Giant', which I worked around. I used a tape measure to loosely measure out the length and width of the pond and decide that 2m x 2m was the maximum pond size that the space would allow, factoring in the stones and plants that would surround it.
The RSPB Pond Liner Kit 3x3m was perfect for covering the pond size. The RSPB Pond Kit includes everything you need to create a thriving wildlife pond. The pond liner needs to be bigger than your actual pond, to allow for overlap around the edges. Each kit comes complete with a durable, non-toxic LDPE liner, recycled fleece underlay and a handy practical guide. Designed for long-lasting performance, the liner is 100% waterproof, completely rot resistant and resistant to sunlight, ensuring reliable durability. For added peace of mind, it is backed by a 30-year guarantee. Costing a grand total of £50, this seemed like the perfect solution.
The Dig
A well-timed redundancy meant that I “broke ground” in Spring and had some time and energy to dedicate to the pond. Needless to say, the dig was not done in one session, it took a few hours over a couple of days to dig away and acted like a form of therapy, as gardening does. A time to clear my mind, do some physical activity and see progress in real-time. Thoroughly satisfying.
I read somewhere that the pond depth needed to be 3 to 4 feet (90 to 120 cm) deep for large fish, so I went with that. Not that I am planning on getting Koi, but would not rule out a few fish and wanted to have the option later. All the excess soil was used to elevate the flower beds around the edge of the garden, so I distributed the soil as I went. Something to consider if you decide to dig your own pond, there is a lot of excess soil!
It took a while to dig to the depth required, luckily only the very centre needs to be full depth, the pond then steps up. The step acts as an aim for wildlife and also a ledge to add plants. Once I was happy with the depth, I added the fleece liner and then the waterproof layer, smoothing as I went, this was somewhat comical and the sheets are so big. Picture me sat in a five-foot-deep hole trying to smooth out a large fleecey sheet.
Rocks and wood
The lining needed to be weighted down around the step and the outer edge. Thankfully one of our neighbours was getting rid of lots of large rockery stones, so that is what we used. This involved a wheelbarrow and many trips to the end of the street and back deadlifting rocks like the World's Strongest Man. We also picked up any fallen branches that we saw on our walk to position around the edge, these we hoped would act as a hiding place for insects.
Filling up the pond
It is advisable to use rainwater to fill the pond. Luckily, we live in Manchester where it rains a lot and we have a water butt, so this simply required a few trips back and forth from the butt until the pond was pretty much full.
Oxygenators
Ponds need oxygenating plants to help keep the water clear, these are the plants that are fully submerged into the pond. You can often buy packs with a variety of oxygenators to get you started. A trip to Bud Garden Centre was in order, we picked up a few varieties and dropped them in.
Emergent plants
These are the plants that are in the shallow end, so positioned on the step inside the pond.
Marginals
Marginal plants grow around the outer edge of the pond, in the boggy areas around the side.
Pollinators
For pollinators I made a shallow area at the side of the pond with a few pebbles, this allows bees and other insects to rest a whole and have a drink. It was well worth doing as I’ve noticed lots of bumblebees resting there.
Wildlife
One of the absolute highlights after making the pond is the wildlife that it has attracted, the garden birds like Blue Tits that hop along for a drink. Then there’s the Dragonflies, wow they are electric blue and green in the sunlight and always a thrill to see. No frogs have been spotted yet, but there is time.
At first the pond looked a little sad, not quite full of water, small plants and the lining still visible. It took a few months for things to start growing and for the rain to fill it up nicely. For quite sometime the pond looked fairly neat and tidy, with pretty flowers, which was lovely but not quite the wild vision.
However, the difference over the last twelve months has been incredibly rewarding and wonderful to see. The rocks around the edge have grown moss, the wood has started to have ferns growing out of it and the marginal and oxygenating plants have flourished. The Pond Lilly has flowered twice(!) and the pond finally looks like it has always been there, a true haven for wildlife. Every season the pond changes, there's always something new to see, new growth, wildlife and changes in light and reflections. What a treat.
I'm by no means an expert, but do hope that this post is of some value to any of you thinking about creating your very own wildlife pond. To anyone thinking about creating a pond, I say do it, do it!